Tuesday, May 10, 2011

About ready to move the girls in.

After finishing some smaller items on Sunday, like adding the screen door to the inside wall and installing an opening system on the pop door, I worked on the run yesterday and today. I got the run attached to the coop this evening and might actually get the chickens in there this week. There's still a lot to do though. I need to install the entry door before moving the chickens in, otherwise it won't be very predator proof. The rest of the trim and painting will need to be completed. I need to add more hardware cloth around the base of the run to keep digging predators out. And eventually I will add a roof to the run. And the hens will need nest boxes too.


Another view of the roosts.

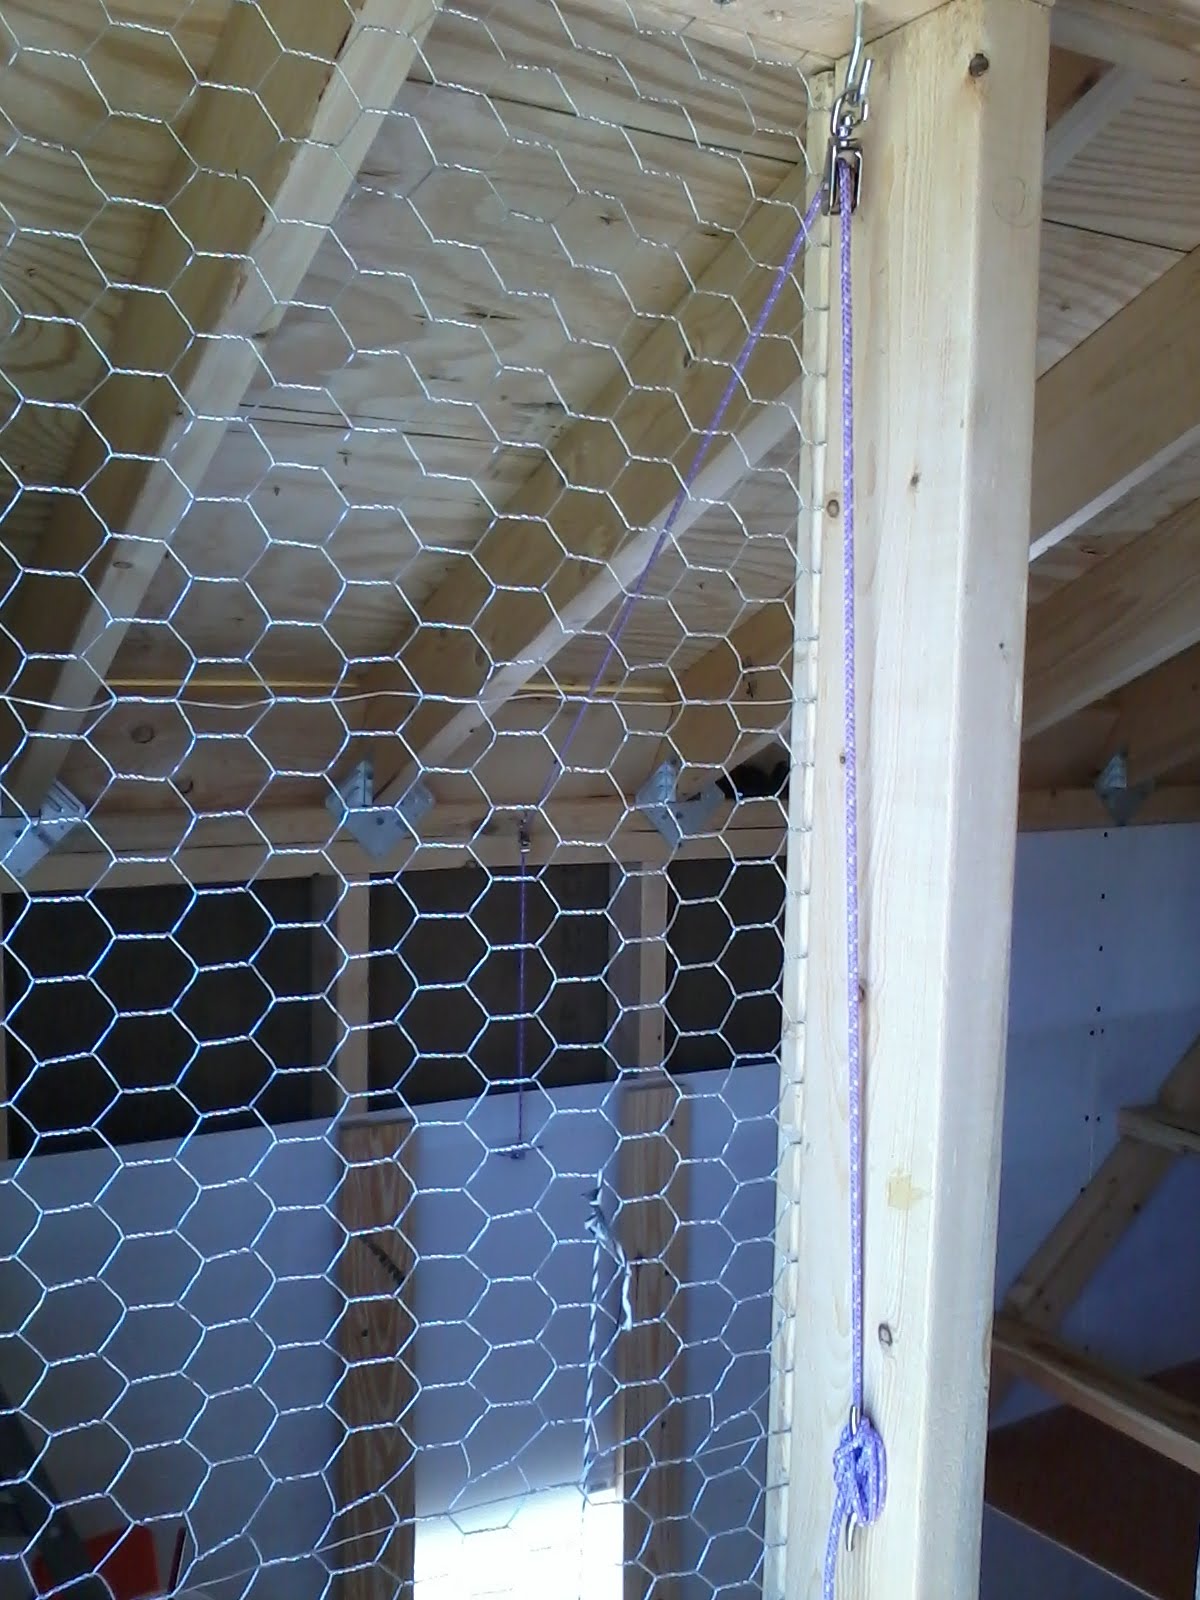
My pulley system for opening the pop door. I used a plastic cutting board for the door.

The end of the rope used to open the pop door.

A view from the roosts of the homemade feeder I made for about half the cost of a factory-made feeder.

The screen door inside the coop. Yes, it's a mess right now, but it's under construction.

I dug holes and back filled them with gravel and used leftover pieces of the 4X6 timbers to place the corners of the chainlink panels on.

Getting the run positioned. Hardware cloth has been added to the bottom two feet of the run to prevent predators like racoons from reaching through the fence and grabbing a bite to eat. I will also attach hardware cloth to the bottom of the fence and let it lay flat on the ground to prevent digging.

I added the trim to the corner tonight and attached the run.

I wanted to give the girls as much run space as possible, so I bought 12-foot panels on sale, but the coop is only 10-feet wide. So, to keep the run square and not lose any square footage, I fashioned an improvised attachment system for the back corner. A piece of trim will cover the edge of the hardware cloth on the corner of the coop.

I sandwiched the other edge of the hardware cloth between two pressure-treated 1X4s and attached the chainlink panel to the 1X4s.

A full view of the run.

Saturday, May 7, 2011

Roosts are in.

They're not the most beautiful things in the world, but I got the roosts in with a poop board underneath. I installed them after covering more of the wall with plywood to the side and back of the roosts. I also worked on the pop door opening, making the bottom more watertight and adding the trim to the outside.


Not sure if there's enough room for them, but it'll have to do.

The trim around the pop door. Once I get the trim on the two corners on this side, I can work on attaching the run. Then I need a door on the pen area entrance and an entrance door to the coop and I can move them in while I finish the rest of the trimming, painting, etc.

The girls got to enjoy the outside again today after the rain stopped this morning and the sun came out.

Just as I snapped this photo, a Barred Plymouth Rock attempted to fly up on the waterer. I have a plastic pitcher on top though, to keep them off the waterer so they don't constantly crap in their water.

Oh yeah, as you can see, Sarah broke her right arm. She did that last Sunday when she and Isaac were playing around the playhouse. She managed to fall off the slide.

Chickapoo with his head sticking out of the fence, with another chicken sitting on him.

Friday, May 6, 2011

The roof is finished.

It was a beautiful day. When I got home from work, I finished the shingles on the short side. I then primed the fascia board on that side and painted the siding so I can get the run attached, hopefully over the weekend.


Thursday, May 5, 2011

Almost finished with roof shingles.

The rain cut my work short tonight, but I finished the shingles on the tall side of the coop and only have three or four rows left to do on the short side.


Wednesday, May 4, 2011

A little more progress.

A job sure puts a crimp in the coop building time. Then I had a dentist appointment on Monday and an eye doctor appointment today. But I was able to just about finish with the shingles on the taller roof this evening.

Putting shingles on by yourself doesn't exactly make it a fast job either.

Tuesday, May 3, 2011

Shingles started.

I was able to get started on the roof shingles today. Rain is moving in on Thursday, so hopefully I can get finished before the next round of precipitation.


Monday, May 2, 2011

Sunday's progress.

Sunday proved pretty productive despite the threat of rain and eventual light showers. I managed to get the windows in the clerestory wall, complete the walls in the actual chicken area of the coop, including caulking along the floor and the joints between sheets of plywood. I placed pulleys for opening the pop door from outside the chicken area but need to get hardware for the actual door to connect the rope to the top of the door. I also tinkered with the placement for the feeder and waterer. I have the feeder hanging temporarily until I get the roosts in and decide exactly where to put it.

This evening after work and my dentist appointment, I took it easy and just applied primer to the trim lumber.


Roof shingles, entry door, some trim and a little paint and the outside will be finished. Also need to get moving on the run.

Looking down the narrow part of the chickens' area from the corner where the roosts will be.

This is the corner where the roosts will be placed. The pop door is to the left and the entry door into the chicken area is to the right.

Looking back from the corner where the roosts will be.

Saturday, April 30, 2011

The siding is done.

I got the last of the siding up today. Hoping to have time tomorrow to get the last two windows in.


Once I got the siding on the clerestory wall, around the window openings, it was too dark to take a photo.


It was such a nice day, the girls and guy spent a little time outdoors today.

Thursday, April 28, 2011

Chickapoo is crowing.

While I was in the garage this evening priming some plywood for the coop, my little rooster made his first attempts at crowing. Man, did it sound sick. And it scared the crap out of the hens. As for the coop, I finished getting the chicken wire installed on the top part of the half-wall and much of the plywood on the lower part of the chicken area of the coop.


This view is looking down the additional area I added for the chickens by turning the wall and making their area L-shaped.

This view is from the corner looking out the inner door from the chicken area of the coop.